
Taula de continguts:
- Autora John Day day@howwhatproduce.com.
- Public 2024-01-30 08:14.
- Última modificació 2025-01-23 14:38.


Vaig començar amb la idea de "Puc controlar la llum amb les meves pròpies mans i expressar la meva pròpia voluntat?"
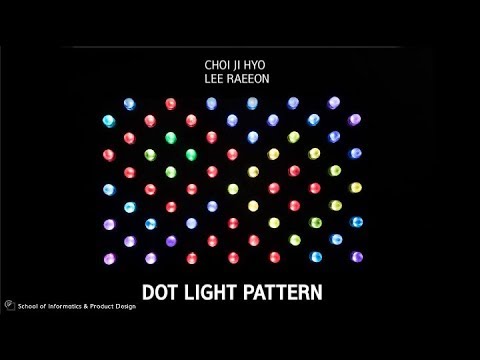
És un "patró de llum de punts" que us permet crear els vostres propis colors, dissenyar els vostres propis patrons amb aquests colors i experimentar diversos efectes d'animació.
Pas 1: materials


- Arduino UNO x 13
- Tira LED LED WS2901 o WS2811 (130 LED)
- Interruptor de botó x 1
- Interruptor de pressió x 65
- Potenciómetre x 65
- Cable arc de Sant Martí
- Potència suficientment SMPS
- Cable conductor
- Barra rodona transparent acrílica (30 mm de diàmetre)
- Tauler acrílic de color negre (5T) (500 mm * 790 mm) x 2, (500 mm * 35 mm) x 2, (790 mm * 35 mm) x 2
Pas 2: pla de construcció


Pas 3: Maquinari: disseny de circuits


-
Talleu la placa acrílica com l'estructura anterior. (vegeu el pas 2)
- Es posa una peça de LED de neopíxels a la part superior i inferior del forat del potenciómetre i s’hi adjunten un total de 65 parells de LED de neopíxels.
- Un parell de LED de neopíxels es connecten junts per formar un sol pin Arduino.
- Ajusteu 65 potenciómetres als forats del potenciómetre. (Col·loqueu-lo al costat oposat d'una superfície neo-pixelada.)
- Connecteu 65 interruptors de pressió perquè coincideixin amb els forats de l’interruptor.
- Un total de tretze ONU Arduino s’uneixen a cadascuna de les tretze zones per lligar cinc peces de 65 peces de maquinari en un Arduino UNO.
- Com es mostra a la foto adjunta, connecteu els cables de potenciómetre, els interruptors de pressió i els LED de neopíxels als pins de l’Arduino UNO per cable. (vegeu el pas 2)
- Els pins GND i 5V de diversos Arduino UNO es recullen als cables dels cables, i després es connecten a l'alimentació externa. (vegeu el pas 2)
- Traieu la pols mitjançant la pressió de l'aire.
Pas 4: Maquinari: tall acrílic


- Talleu la vareta d’acrílic a una longitud de 50 mm.
- Un costat de la vareta acrílica es perfora a la mida i la profunditat perquè coincideixi amb la part controladora del potenciómetre.
- La vareta d’acrílic està retallada una mica més ampla que el forat per obtenir un joc que s’adapti bé al potenciómetre.
-
L’altre costat dóna una mica de paper de vidre perquè la llum es pugui transmetre perfectament.
Pas 5: Codi de programació Arduino
www.kasperkamperman.com/blog/arduino/ardui…
codi 'hsb a rgb' 를 참고 한 사이트
#incloure
// 'adafruit_neopixel' 헤더 파일 라는 외부 라이브러리 를 포함
// 네오 픽셀 연결 핀 번호 선언
#define PIN1 2 #define PIN2 3 #define PIN3 4 #define PIN4 5 #define PIN5 6
#define NUMPIXELS 2 // 네오 픽셀 LED 갯수
#define NUM_LIGHTS 5 // 작동 모듈 갯수 (네오 픽셀 오브젝트 갯수)
// 네오 픽셀 오브젝트 Matriu 선언
píxels Adafruit_NeoPixel = {Adafruit_NeoPixel (NUMPIXELS, PIN1, NEO_GRB + NEO_KHZ800), Adafruit_NeoPixel (NUMPIXELS, PIN2, NEO_GRB + NEO_KHZ800), Adafruit_NeoPixel (NUMPIXELS, PIN3, NEO_GRB + NEO_KHZ800), Adafruit_NeoPixel (NUMPIXELS, PIN4, NEO_GRB + NEO_KHZ800), Adafruit_NeoPixel (NUMPIXELS, PIN5, NEO_GRB + NEO_KHZ800)}; //// 네오 픽셀 을 사용 하기 위해 객체 하나 를 생성 한다. // 첫번째 인자 값 은 네오 픽셀 의 LED 의 개수 // 두번째 인자 값 은 네오 픽셀 이 연결된 아두 이노 의 핀 번호 // 세번째 인자 값 은 네오 픽셀 의 타입 에 따라 바뀌는 flag
//////////////////////////////////////////////////////////////
////// HSV 를 RGB 로 변환 하는 함수 getRGB () 를 위한 변수 와 함수 선언
byte const dim_curve = {
0, 1, 1, 2, 2, 2, 2, 2, 2, 3, 3, 3, 3, 3, 3, 3, 3, 3, 3, 3, 3, 3, 3, 4, 4, 4, 4, 4, 4, 4, 4, 4, 4, 4, 4, 5, 5, 5, 5, 5, 5, 5, 5, 5, 5, 6, 6, 6, 6, 6, 6, 6, 6, 7, 7, 7, 7, 7, 7, 7, 8, 8, 8, 8, 8, 8, 9, 9, 9, 9, 9, 9, 10, 10, 10, 10, 10, 11, 11, 11, 11, 11, 12, 12, 12, 12, 12, 13, 13, 13, 13, 14, 14, 14, 14, 15, 15, 15, 16, 16, 16, 16, 17, 17, 17, 18, 18, 18, 19, 19, 19, 20, 20, 20, 21, 21, 22, 22, 22, 23, 23, 24, 24, 25, 25, 25, 26, 26, 27, 27, 28, 28, 29, 29, 30, 30, 31, 32, 32, 33, 33, 34, 35, 35, 36, 36, 37, 38, 38, 39, 40, 40, 41, 42, 43, 43, 44, 45, 46, 47, 48, 48, 49, 50, 51, 52, 53, 54, 55, 56, 57, 58, 59, 60, 61, 62, 63, 64, 65, 66, 68, 69, 70, 71, 73, 74, 75, 76, 78, 79, 81, 82, 83, 85, 86, 88, 90, 91, 93, 94, 96, 98, 99, 101, 103, 105, 107, 109, 110, 112, 114, 116, 118, 121, 123, 125, 127, 129, 132, 134, 136, 139, 141, 144, 146, 149, 151, 154, 157, 159, 162, 165, 168, 171, 174, 177, 180, 183, 186, 190, 193, 196, 200, 203, 207, 211, 214, 218, 222, 226, 230, 234, 238, 242, 248, 255, }; //
void getRGB (int hue, int sat, int val, int colors [5] [3], índex int) {
val = dim_curve [val]; sat = 255 - dim_curve [255 - sat];
// 색조, 채도 및 밝기 (HSB / HSV) 를 RGB 로 변환
// dim_curve 는 밝기 값 및 채도 (반전) 에서만 사용 됩니다. // 이것은 가장 자연스럽게 보입니다.
int r;
int g; int b; int base;
if (sat == 0) {
colors [índex] [0] = val; colors [índex] [1] = val; colors [índex] [2] = val; } més {
base = ((255 - sat) * val) >> 8;
commutador (tonalitat / 60) {
cas 0: r = val; g = (((val - base) * matís) / 60) + base; b = base; trencar;
cas 1:
r = (((val - base) * (60 - (tonalitat% 60))) / 60) + base; g = val; b = base; trencar;
cas 2:
r = base; g = val; b = (((val - base) * (matís% 60)) / 60) + base; trencar;
cas 3:
r = base; g = (((val - base) * (60 - (tonalitat% 60))) / 60) + base; b = val; trencar;
cas 4:
r = (((val - base) * (matís% 60)) / 60) + base; g = base; b = val; trencar;
cas 5:
r = val; g = base; b = (((val - base) * (60 - (tonalitat% 60))) / 60) + base; trencar; }
colors [índex] [0] = r;
colors [índex] [1] = g; colors [índex] [2] = b; }
}
int rgb_colors [NUM_LIGHTS] [3]; // 네오 픽셀 오브젝트 갯수 마다 color rgb 선언
tonalitat int [NUM_LIGHTS]; // 네오 픽셀 오브젝트 갯수 마다 hue 선언 int sat [NUM_LIGHTS]; // 네오 픽셀 오브젝트 갯수 마다 명도 선언 int brignt [NUM_LIGHTS]; // 네오 픽셀 오브젝트 갯수 마다 밝기 서언
// 일반 변수 선언
int startsSwitch = {8, 9, 10, 11, 12}; // on / off 버튼 핀 번호 boolean startState = {fals, fals, fals, fals, fals}; // activat / desactivat 상태 변수
const int colorPin = {A0, A1, A2, A3, A4}; // 가변 저항 핀 번호
int colorVal = {0, 0, 0, 0, 0}; // 가변 저항 초기 값
int animationButton = 7; // 애니메이션 모드 변환 버튼 핀 번호
/////////////////////////////////////////////////
// 애니메이션 모든 변환 을 위한 버튼 디 바운싱 변수 선언 // 디 바운싱? Button 시간 내 많은 이벤트 가 발생 하는것 에 대한 문제 에 대해서 지정된 시간 간격 으로 함수 를 호출 하여 해결 int buttonState; // 입력 핀 으로부터 의 현재 판독 값 int lastButtonState = HIGH; // 이전 의 판독 값 은 켜진 상태 로 unsigned long lastDebounceTime = 0; // 출력 핀 이 마지막 으로 전환 된 시간 은 0 으로 unsigned long debounceDelay = 50; // 디 바운싱 타임 설정; 출력 이 깜빡 이면 증가 한다 int MODE = 0; // 애니메이션 모드 변수
int B_Interval [5]; // 블 링킹 을 위한 각 모듈 의 랜덤 속도 변수
int B_Min = 100; // 블 링킹 최단 속도; int B_Max = 500; // 블 링킹 최장 속도; int R_Interval = 50; // 레인보우 애니메이션 속도 변수 int D_Interval = 10; // 디밍 속도 변수
B_estat booleà [5]; // 블 링킹 을 위한 각 모듈 의 상태 변수
///////////////////////////////////////////////////////
// 멀티 테스 킹 애니메이션 을 위한 시간 변수 선언
llarg sense signar currentMillis; // 현재 시간 변수
unsigned long B_previousMillis [5]; // 각 모듈 의 블 링킹 타이머 unsigned long DR_Millis [5]; // 각 모듈 의 디밍 랜덤 타이머 (예비) unsigned long R_previousMillis; // 레인보우 타이머 unsigned long D_previousMillis; // 디밍 타이머
boolean firstRainbow = true; // 레인보우 색상 초기화 상태 변수
int RainbowSpeed; // 레인보우 변환 변수
int Brillant = 100; // 디밍 초기 값 int BrightnessFactor = 1; // 디밍 증감 값 /////////////////////////////////////////////// ////////////////////////////////////////
configuració nul·la () {
for (int i = 0; i <NUM_LIGHTS; i ++) {pixels .begin (); // 네오 픽셀 오브젝트 초기화}
// 버튼 인풋 설정
for (int i = 0; i <NUM_LIGHTS; i ++) {pinMode (startsSwitch , INPUT_PULLUP); // on / off 버튼 인풋 설정} pinMode (animationButton, INPUT_PULLUP); // 애니메이션 버튼 인풋 설정
for (int i = 0; i <NUM_LIGHTS; i ++) {B_Interval = int (aleatori (B_Min, B_Max)); // 모듈 별 블 링킹 랜덤 속도 (인터발) 변수 생성}
Serial.begin (9600); // 통신 설정
}
bucle buit () {
MODE = CheckAnimMode (); // 모드 에 애니메이션 체크 모드 함수 를 넣는다
// 버튼 과 가변 저항 을 값 을 각각 읽어 변수 에 지정 한다.
for (int i = 0; i <NUM_LIGHTS; i ++) {startState =! digitalRead (startsSwitch ); // on / off 버튼 에서 읽은 값 의 반대 값 을 startState 에 넣어 준다 // startState = DigitalRead (arrencaInterruptor ); colorVal = analogRead (ColorPin ); // 가변 저항 에서 읽은 값 을 가변 저항 초기 값 에 넣는다}
commutador (MODE) {// 애니메이션 함수 스위치 문
cas 0: on (); // en 실행 실행 trencar; // 조건문 에서 빠져 나가라
cas 1:
arc de Sant Martí (); // arc de Sant Martí 함수 실행 trencar;
cas 2:
atenuació (); // atenuació 함수 실행 pausa;
cas 3:
parpellejar (); // parpellejar 함수 실행 trencar; }
for (int i = 0; i <NUM_LIGHTS; i ++) {pixels .show (); // 네오 픽셀 오브젝트 배열 켜라}
}
/////////////////////////////////////////////////////////////
int CheckAnimMode () {
// 애니메이션 선택 버튼 을 읽어 모드 를 결정 한다.
////////////////////////////////////////////////////// /// currentMillis = millis (); // 시간 측정 int reading = DigitalRead (animationButton); if (reading! = lastButtonState) {// 입력 핀 으로부터 이전 의 버튼 의 상태 와 판독 값 비교 lastDebounceTime = millis (); // 현재 시간 을 출력 핀 이 마지막 으로 전환 된 시간 에 넣음}
if ((currentMillis - lastDebounceTime)> debounceDelay) {
if (reading! = buttonState) {// 입력 핀 으로부터 받은 현재 값 과 판독 값 과 비교
buttonState = lectura; // 판독 값 을 buttonState 에 대입
if (buttonState == LOW) {// 버튼 상태 가 꺼져 있다면
MODE ++; // 버튼 모드 1 씩 증가 if (MODE> 3) {MODE = 0; primer Arc de Sant Martí = veritable; // actor 색상 초기화 상태 켜짐 BrightnessFactor = 1; // 디밍 증감 값 Brillant = 15; // 밝기 는 15}}}}
lastButtonState = lectura; // 판독 값 을 이전 의 버튼 상태 에 대입
retorn MODE; 함수 를 종료 하고 mode 함수 로 값 을 리턴 하라}
////////////////////////////////////////////////////////////////////
// funció de mode d'animació
// encès
void on () {Serial.println ("activat"); // 시리얼 모니터 에 on 을 써라 for (int i = 0; i <NUM_LIGHTS; i ++) {color_set (i, colorVal ); // 가변 저항 값 에 따라 컬러 셋팅}}
// Arc de Sant Martí
void rainbow () {Serial.println ("pluja"); // 시리얼 모니터 에 pluja 을 써라 if (primer arc de Sant Martí) {RainbowSpeed = 0; // 레인보우 속도 초기화 primer Arc de Sant Martí = fals; // 레인보우 색상 초기화 상태 꺼짐} if (millis () - R_previousMillis> R_Interval) {// 흐른 시간 값 이 레인보우 인터벌 값 보다 크면 R_previousMillis = currentMillis; // 현재 시간 을 이전 의 레인보우 시간 에 넣어 라 RainbowSpeed + = 10; // 레인보우 변환 변수 에 10 을 더해라}
per a (int i = 0; i <NUM_LIGHTS; i ++) {color_set (i, (colorVal + RainbowSpeed)% 1023); // 레인보우 컬러 셋팅}
}
// Atenuació
void dimming () {Serial.println ("dimm"); // 시리얼 모니터 에 dimm 을 써라 Serial.println (brillant); // 시리얼 모니터 에 Brillant 써라 써라 if (currentMillis - D_previousMillis> D_Interval) {// 흐른 시간 값 이 디밍 인터벌 값 보다 크면 D_previousMillis = currentMillis; // 현재 시간 을 이전 의 디밍 시간 에 넣어 라 Bright + = BrightnessFactor; // 밝기 에 디밍 증감 값 1 씩 올려라} if (Bright 254) {BrightnessFactor = -1 * BrightnessFactor; } Brillant = restringir (Brillant, 99, 254); // 변수 밝기 값 을 최소값 99 ~ 최대 값 254 사이 의 값 으로 한정 한다
for (int i = 0; i <NUM_LIGHTS; i ++) {dim_color_set (i, Bright); // 디밍 컬러 셋팅}}
// Parpellejant
buid intermitent () {Serial.println ("parpellejar"); // 시리얼 모니터 에 parpelleja 를 써라
for (int i = 0; i B_Interval ) {// 흐른 시간 값 이 블링크 인터벌 값 보다 크면
B_previousMillis = actualMillis; // 현재 시간 을 이전 의 블링크 시간 에 넣어 라 B_state =! B_state ; // 각 모듈 의 블 링킹 상태 변수 의 값 의 반대 값 을 대입 하라}} per (int i = 0; i <NUM_LIGHTS; i ++) {if (B_state ) {// 모듈 의 블 링킹 상태 가 읽 히면 color_set (i, colorVal ); // 가변 저항 값 에 따라 컬러 셋팅} else {noColor_set (i); // 읽히지 않으면 컬러 셋팅 하지 않음}}
}
////////////////////////////////////////////////////////////////////////////////////////
// funció bàsica
// conjunt de colors
void color_set (int index, int colorSenser) {
if (startState [index]) {tonalitat [index] = mapa (colorSenser, 0, 1023, 0, 359); // 0 ~ 1023 값 을 0 ~ 359 값 으로 매핑 한 값 을 가지고 색상 값 으로 지정 (colorSenser 에) getRGB (tonalitat [índex], 255, 255, rgb_colors, índex); for (int i = 0; i <NUMPIXELS; i ++) {pixels [index].setPixelColor (i, pixels [index]. Color (rgb_colors [index] [0], rgb_colors [index] [1], rgb_colors [index] [2])); } // 픽셀 컬러 셋팅 을 rgb_colors 의 r, g, b 으로 설정} else noColor_set (index); // 컬러 셋팅 하지 않음}
////// noColor set
void noColor_set (int index) {// 컬러 셋팅 하지 않는 함수 설정
for (int i = 0; i <NUMPIXELS; i ++) {pixels [index].setPixelColor (i, pixels [index]. Color (0, 0, 0)); } // 픽셀 컬러 세팅 을 0, 0, 0 으로 설정}
//// conjunt dimColor
void dim_color_set (int index, int BC) {// 디밍 컬러 셋팅 함수 설정
if (startState [index]) {tonalitat [index] = mapa (colorVal [índex], 0, 1023, 0, 359); // 0 ~ 1023 값 을 0 ~ 359 값 으로 매핑 한 값 을 가지고 색상 값 으로 지정 (colorVal 에) getRGB (tonalitat [índex], 255, BC, rgb_colors, índex); for (int i = 0; i <NUMPIXELS; i ++) {pixels [index].setPixelColor (i, pixels [index]. Color (rgb_colors [index] [0], rgb_colors [index] [1], rgb_colors [index] [2])); } /// 픽셀 컬러 셋팅 을 rgb_colors 의 r, g, b 으로 설정} else noColor_set (index); // 컬러 셋팅 하지 않음}
Pas 6: una mirada acabada
Recomanat:
ESP8266 Patró de radiació: 7 passos

Patró de radiació ESP8266: l’ESP8266 és un mòdul de microcontrolador popular perquè es pot connectar a Internet mitjançant el WiFi integrat. Això obre moltes oportunitats a l’aficionat per fabricar aparells i dispositius IoT controlats a distància amb el mínim de disc dur
Com es fa el patró de disseny de Singleton en C ++: 9 passos

Com fer el patró de disseny Singleton a C ++: Introducció: El propòsit d’aquesta guia d’instruccions és ensenyar a l’usuari com implementar el patró de disseny Singleton al seu programa C ++. En fer-ho, aquest conjunt d'instruccions també explicarà al lector per què els elements d'un singleton són el camí
Tutorial ME 470: Característiques del patró: 6 passos

Tutorial ME 470: Característiques del patró: els patrons poden estalviar temps en parts amb funcions repetides
Fer una llum nocturna LED amb patró d’estrella: 8 passos (amb imatges)
")
Fer una llum de nit LED amb patró d’estrelles: aquesta llum de nit LED presenta un patró d’estrelles i il·lumina una habitació fosca d’una manera màgica. He utilitzat ipe per a la fusta, però qualsevol fusta fosca o MDF pintat, per exemple, funcionaria bé. Aquest és un projecte molt divertit i seria fantàstic com a llum d’accent
Mini llum de nit de llum de nit / llum: 5 passos

Llum / làmpada nocturna de nit de mini LED: primer, hauria de dir que es va inspirar en la làmpada LED de peu Mini de Sunbanks. En lloc d’utilitzar un biro per mantenir el led allunyat de l’escriptori, he utilitzat un clar perspex per projectar la llum de la base. Aquest petit projecte és un prototip